


This post may contain affiliate links to products I use and highly recommend. You can read my full disclosure . As an Amazon Associate I earn from qualifying purchases.
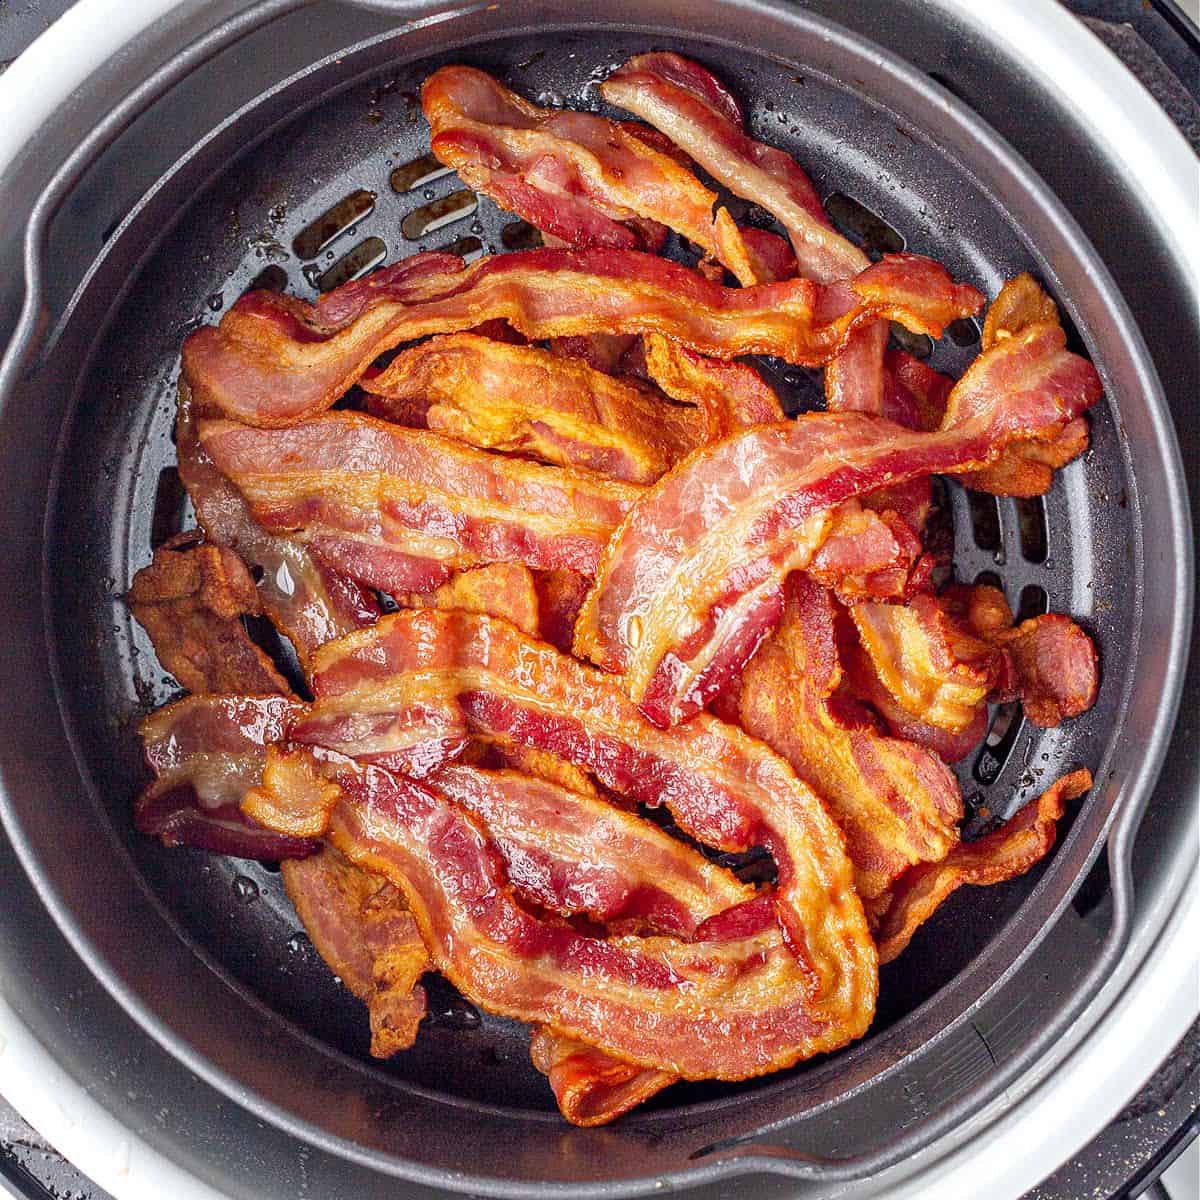
Ninja Foodi air fryer bacon is one of my favorite ways to make crispy bacon without standing over a skillet or dealing with grease splattering across the stove. I use the Air Crisp setting to cook the bacon until it’s browned and as crispy as I like it. It’s especially handy when I’m making a big breakfast and need the stovetop for everything else.

This air fryer bacon recipe works whether you’re making a few slices or an entire package, although larger batches need a little more attention. You can serve the bacon with breakfast, tuck it into sandwiches, or crumble it into recipes like my BLT Salad and Chicken Bacon Ranch Casserole.
Why You’ll Love This Recipe
- Keeps your stovetop free: You can cook bacon while using your burners for other dishes.
- Crispy bacon without much effort: Six slices only need one flip, and you can adjust the cooking time to get the crispness you like.
- Works for different amounts: Make a few slices for breakfast or cook an entire package when you need more bacon.

Ingredients Needed
You only need bacon and, optionally, a little water. The exact amounts are in the recipe card.
- Bacon: I usually use thin-cut, no-sugar-added bacon, but regular or thick-cut bacon works too.
- Water (optional): Adding a little water beneath the Ninja Foodi basket can help reduce smoking from the bacon grease. If you have a regular basket-style air fryer without a separate cooking pot, just skip the water. You can still make this recipe!

How to Make Bacon in the Ninja Foodi
Here’s how I cook six slices of bacon using the Ninja Foodi Air Crisp setting. It’s my preferred approach when I want evenly cooked bacon without much attention.
Prepare the Ninja Foodi
Add 2 tablespoons of water to the bottom of the cooking pot, if using. Place the air fryer basket inside so the bacon sits above the water.
Arrange the Bacon
Lay six slices of bacon in a single layer without overlapping. This gives the strips room to cook evenly.
Air Fry Until Crispy
Set the Ninja Foodi to Air Crisp at 400°F. Cook for 10–12 minutes, flipping halfway through. Check near the end and remove the bacon once it’s as crispy as you like. Transfer it to a paper towel-lined plate to drain.
Ninja Foodi Bacon Cooking Times
The cooking time depends on the thickness of your bacon and how much you’re making. Here’s what works for me at 400°F.
- 6 slices of regular or thin-cut bacon: 10–12 minutes, flipping halfway through.
- 6 slices of thick-cut bacon: 11–14 minutes, flipping halfway through.
- Entire package of regular bacon: 12–16 minutes, flipping and rearranging the strips more frequently.
I’ve cooked an entire package in my Ninja Foodi when I needed more bacon at once. It works well, but you do have to move the strips around more often to help them crisp evenly. It’s not quite as hands-off as cooking six slices, but I still find it convenient.
These times are a guide. Check your bacon near the end since the thickness, your air fryer model, and how crispy you like it can affect the cooking time.
Tips for the Best Ninja Foodi Bacon
- Keep an eye on the grease: Bacon releases quite a bit of fat as it cooks. Start with a clean cooking pot, use your kitchen ventilation, and stop cooking if the grease begins smoking excessively.
- Drain the cooked bacon: I transfer the finished strips to paper towels to absorb extra grease, especially when I’m planning to crumble the bacon into another recipe.
- Keep it warm: If you’re making bacon ahead of the rest of breakfast, place the cooked strips in an oven on its lowest or warm setting until you’re ready to serve.

Do You Need Water to Cook Bacon in the Ninja Foodi?
No, the water isn’t necessary. I sometimes forget to add it when I’m busy making breakfast, and the bacon still turns out just fine!
I also skip it when I want to save the bacon grease for cooking other dishes, like searing scallops. The rendered fat collects beneath the basket, so I let it cool enough to handle safely, strain it into a suitable container, and refrigerate it for later.
Ways to Use Air Fryer Bacon
Besides eating a few crispy slices straight from the air fryer, I use this method whenever I need cooked bacon for another recipe.
- Breakfast and brunch: Serve it with eggs, pancakes, biscuits, or my Cauliflower Hash Browns. You can also add a few strips to a breakfast sandwich or serve them with stuffed French toast. For a holiday breakfast, crispy bacon also makes a delicious salty side for my eggnog French toast casserole.
- Sandwiches and burgers: Add crispy bacon to a BLT, turkey sandwich, or my Ground Chicken Burgers for a bacon cheeseburger.
- Salads: Chop or crumble the bacon over my Chicken Cobb Salad or your favorite green salad.
- Casseroles and loaded sides: Use cooked bacon in cheesy casseroles, sprinkle it over baked potatoes, or add it to my Loaded Cauliflower Casserole.
How to Store and Reheat Bacon
- Refrigerate: Let the bacon cool, then store it in an airtight container in the refrigerator for up to 5 days.
- Reheat: Air fry at 375°F for about 5 minutes, checking that it doesn’t get too crispy.
- Freeze: Store cooled bacon in a freezer-safe container or bag for up to 4 months. You can pull out a few slices whenever you need cooked bacon for another meal.
Ninja Foodi Air Fryer Bacon
Use DRDAVINAHS at checkout to save on some equipment & ingredients!
Recommended Equipment
- Ninja Foodi or basket-style air fryer
Ingredients
- 6 slices bacon, regular or thin-cut; no-sugar-added preferred
- 2 tbsp water, optional
Instructions
- If using water, add it to the bottom of the Ninja Foodi cooking pot, then insert the air fryer basket. Skip the water if your air fryer does not have a separate cooking pot.
- Arrange 6 slices of bacon in a single layer in the air fryer basket without overlapping.
- Set the Ninja Foodi to Air Crisp at 400°F. Cook for 10–12 minutes, flipping halfway through. Check near the end and cook until the bacon reaches your preferred crispness.
- Transfer the bacon to a paper towel-lined plate to drain and serve.
Save This Recipe for Later
Recipe Notes
- Thick-cut bacon: Cook for 11–14 minutes, flipping halfway through.
- Entire package of regular bacon: Cook for 12–16 minutes, flipping and rearranging the strips more frequently so they crisp evenly.
- Water is optional: It can help reduce smoking in a Ninja Foodi cooking pot. Skip it if you want to save the rendered bacon grease.
Nutrition Details
The nutrition facts come from entering the recipe ingredients into a database of food ingredients. They may vary for any recipe based on the exact product used.













Nan says
I like to put raw bacon strips on both top and bottom of my meatloaf when baking it.
Do you have a suggestion for doing this in my ninja foodi air fryer?
Thank you
Davinah Cenou Montezuma says
Hi Nan,
Depending on the cook time of your meatloaf, the bacon should cook fully, but I’d be sure to flip your meatloaf to ensure it browns and crisps evenly. Another option is to precook your bacon for 5 minutes in the air fryer. This will allow the bacon to crisp while it cooks with the meatloaf.
Thanks,
Davinah
Priya Lakshminarayan says
More the reasons to get an air fryer now..nice recipe
Dr. Davinah's Eats Team says
We really appreciate you stopping back to write such a thoughtful review.
Jacque Hastert says
I just devoured my BLT! I found this recipe and decided to give it a whirl. I will NEVER go back to frying bacon on the stove. The air fryer is the way to go. Thank you for sharing!
Dr. Davinah's Eats Team says
Thank you so much for trying our recipe. We’re glad you enjoyed it.
Emily Liao says
Air fryer bacon is the best! Love how crispy my bacon turns out!
Dr. Davinah's Eats Team says
Thank you so much for trying our recipe. We’re glad you loved it.
SHANIKA says
The air fryer is such a great thing to have! This bacon came out ultra crispy! Love it!
Dr. Davinah's Eats Team says
Thank you so much for trying our recipe. We’re glad you loved it.
Cate says
This is such a great idea! A healthier way to get bacon cookin’ in the morning, thanks for sharing!
Dr. Davinah's Eats Team says
You’re welcome! We’re so glad you liked it.
Charlie says
It is an awesome recipe. I like oily food. Can I add here a little bit more oil in those recipe?
Davinah says
Hi Charlie,
I personally don’t add oil to my bacon when cooking since the bacon releases so much of its own oil and fat. So, I wouldn’t recommend this.
Thanks,
Davinah